
Running npx create-expo-app@latest MyProjectName -t tabs@sdk-49 makes it really easy to get started with navigation in your React Native project, however with Expo Router v1 you were locked in on their pre-installed directory structure in order to use it. Well, good news! With Expo Router v2 you’re now able to reconfigure your application’s directory structure so that you can take advantage of navigation features without compromising your desired folder structure. It may seem daunting at first, but it’s actually pretty simple and can be done in 2 steps.
Step 1 – Move Files to New Directory.
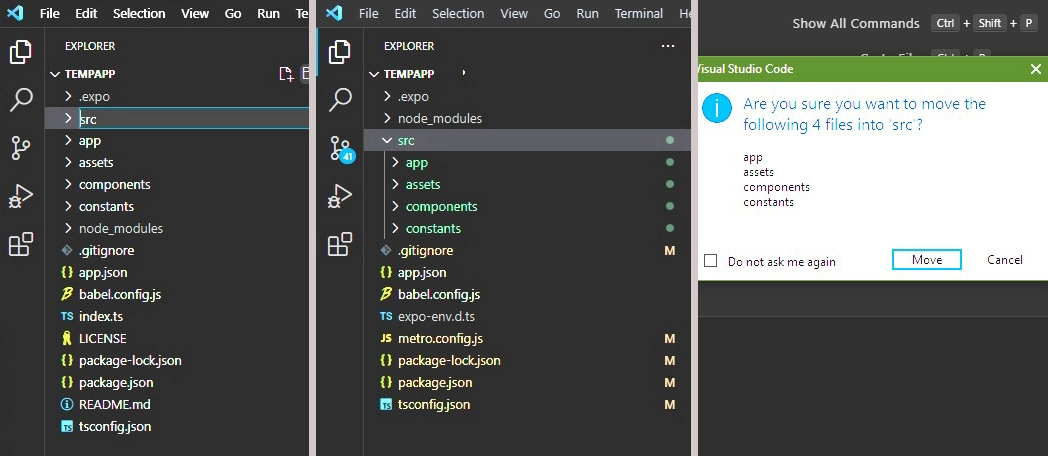
Create a new directory in your file explorer. In my case, I’m adding a folder called src to my project’s top level that will house the app, assets, components, and constants that Expo Router creates by default. Note: I’ve had occasional issues with it taking forever for files to move via VSCode, so it may be faster for you to open your project in Explorer/Finder and move them that way.
Step 2 – Update TSConfig.json Path
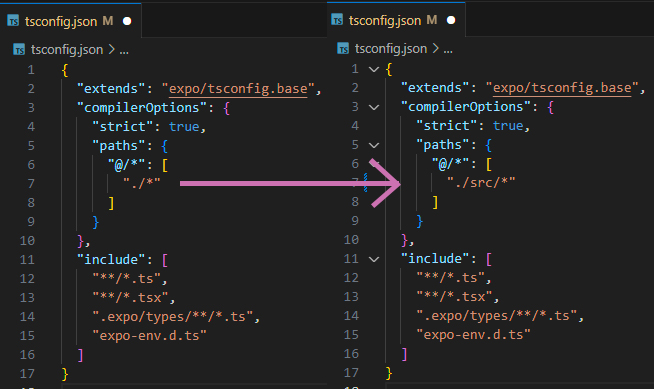
Once the files are moved, update your tsconfig.json file in your root directory to use the newly created directory and save. In my case I went from "./*" to "./src/*" and that was it, all done!
Note: if you’re going to keep some files/directories outside of your new folder you will just need to be sure to update those paths manually in your files.
Additionally, if moving your assets folder, you will need to update your app.json file in a few spots to include the new path.
That’s it. I hope it helps!